managing Stages
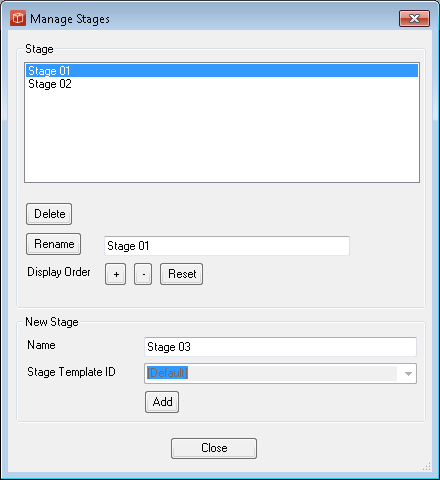
Users with a manager licence and a modify permission on the current project can add, rename and delete Stages in a project from the 'Manage Stages' form accessed from Project in the main menu.
The Form shows a list of the current stages in presentation order (defaults to alphabetic). Users can add stages by typing the name in the field and pressing Add. By selecting an existing stage in the list it can be renamed, reordered or even deleted. Note: The stage will be created from the same 'template' used to create the owning project this template is shown against the project name in brackets i.e. small project (3step). Version 2.7 now supports multiple Stage types if multiple stage types have been defined within the Method template. The type name is presented in the client in a drop-down list when creating a new stage. the 4 Step method comes pre populated with a range of different stage types. The 'Manage Stages' form also contains Delete option. The user simply clicks on the stage title they wish to remove and then press the 'delete stage' button below the pick list. The user will be prompted with a box saying 'are you sure?' confirming yes will then delete the stage, all its documents and all its associated files and versions from the project and from other processes where they were being shown. To rename a stage again the use the Managing Projects admin form. The user simply clicks on the stage title they wish to rename, then types the required new name into the 'stage name' single line dialogue' to complete the action press the 'rename stage' button. |
