Edit Plan - Manage Resources
Once you have a Planner file checked out to work on in Planner Live you can use the Manage resources button at the top of the form to switch to this element and manage the resources available for use in the plan. The form shows you the current resource list on the left side and on the right in a three tabbed pane you have some functionality you can apply to the list.

To work on single resources in the list use the buttons below the list (new delete and undo) along with the form in the Edit Resource tab. To select and edit an item from the list click its number to select it and its current details will display in the Edit Resources tab. Here you can add or modify the name, Initials and Cost per Hour for the user. Press Save to confirm these back to the Manage Resources table.
To delete a resource from the list, select it and then use the Delete button. To add a new resource press new then edit the blank entry and save it.
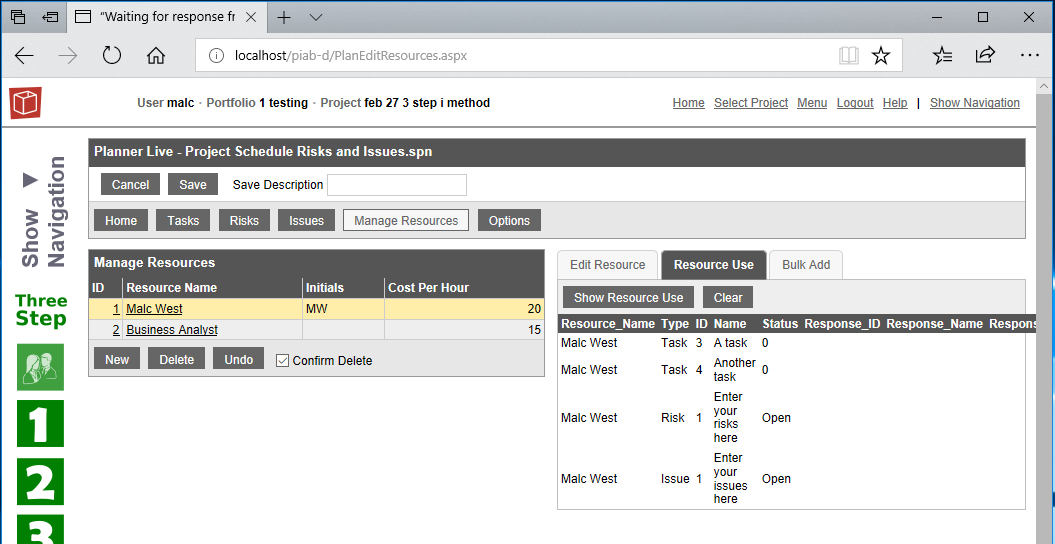
Using the Resource use tab you can find all the places in the current Planner file where that selected resource is allocated (note this could be in tasks, risks and issues depending on the type of Planner file), see here below:

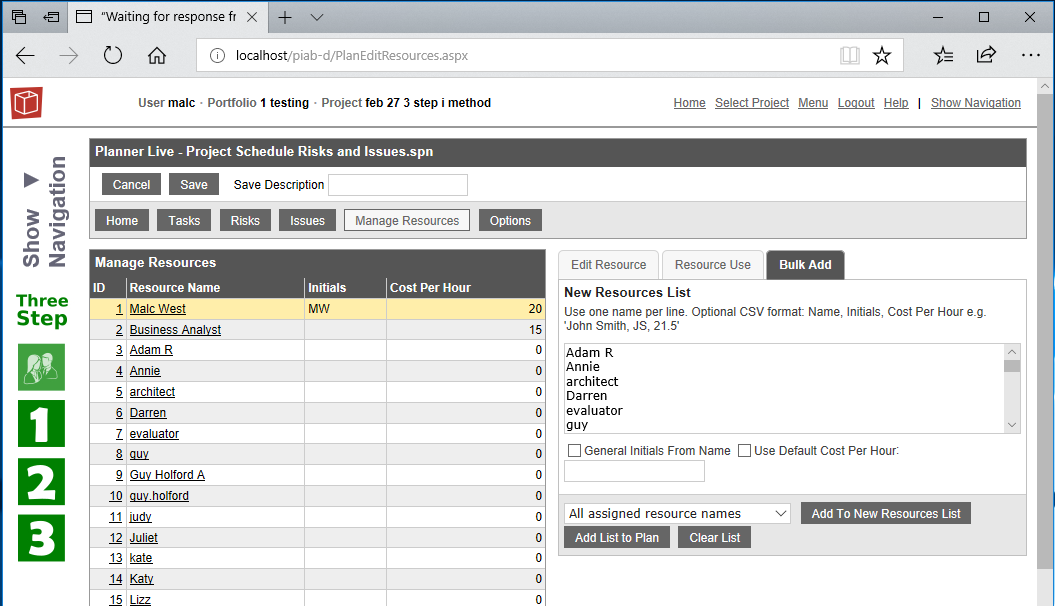
The Bulk add tab allows you to add a block of resource names to the resource list for this project plan. Using the Tab you can either copt and paste a list of names in or can load one of the stnadard lists from the server (see the four choices in the pick list below). You can actually keep adding to and manually deleting the list in the text area as you wish until you are happy with your list and you may then load it to the files resource list with the 'Add list to plan' button. In doing so the system will not add any duplicates so only names not already on your plan resource list will be added. Tick options allow you to define a standard hour rate and to let the software try to determine initials for you.

These are the four choices of data you can add to your text list, which you can then manipulate by hand before loading to the resource list.

Once you are finished with updates go back to editing your data or checking your file back in using the appropriate button.