Edit Plan -Tasks
So you are going to work on your Planner Plan in the Browser. Firstly you will find your file and check it out using Planner live. Use the planner live menu to select Tasks and you will see a view like this one below.
Here you can find most of the plan updating elements that you would in the application version of Planner. In the Gantt Chart header you can choose to show the Gantt chart as an image or not and you can use the basic navigation controls to pan and zoom to navigate this image, you can also change the display interval as well. This Gantt chart display is just an image you cannot click to select as you would in Planner application itself.

In the lower portion of the form is the Edit Task area this is where you will be updating tasks, adding and removing them from the plan. Here we work one task at a time.
The task list is displayed using the column order from the chosen view and next to this are a basic set of controls for the task list as follows:
Edit Task - to edit the selected task in the list
Refresh - to refresh the list and gantt view
Undo - to go back a step
Insert task - to add a new task one below the currently selected one
Up and down arrows - to move the currently selected task up and down the list.
Delete task - deletes the currently selected task
Collapse to outline level n - roll up the plan summaries so only those down to level n are visible
Expand All - expans all summaries
Collapse others - once you start working on a task it's summary group will remain open but all others are autoclosed. This is the default option to try and help when navigating large plans.
All editing of an existing task is done by going to it's row in the table and selecting it and using Edit task or clicking directly on edit. The task form then pops up over the rest of the plan. Showing the selected task highlit below. This Edit task form can be moved around the screen to see the data below if required.

This edit task form mirrors Planner with some layout differences. The General tab enables you to edit the task name, description, Tag and % complete fields by typing into them. The Date Created field is completed automatically by the system.You can decide if your task is normal or a summary task using the radio buttons and identify which summary (or none) your taks is within.
On each tab data can be committed with Apply or Okay, you can proceed to previous or next tasks on the general tab or switch tabs for the current task.

On the Duration tab you can define or alter when the task occurs, the usual four modes are permitted:
Fixed duration - starts at a defined date & Time and runs for a chosen duration
Single Predecessor - starts after an existing task in the plan and runs for a defined duration. A lag can be set so there is a delay between completion of he preceeding task and the start of this one. The system will check to stop circular references here.
Multiple Predecessors - where more than one predecesor link is required. These are coded in the format "2;4+2d" this would mean start afer task 2 and task 4 with a 2 day lag.
Fixed Dates - make the task run from a set date and time to a set date and time.
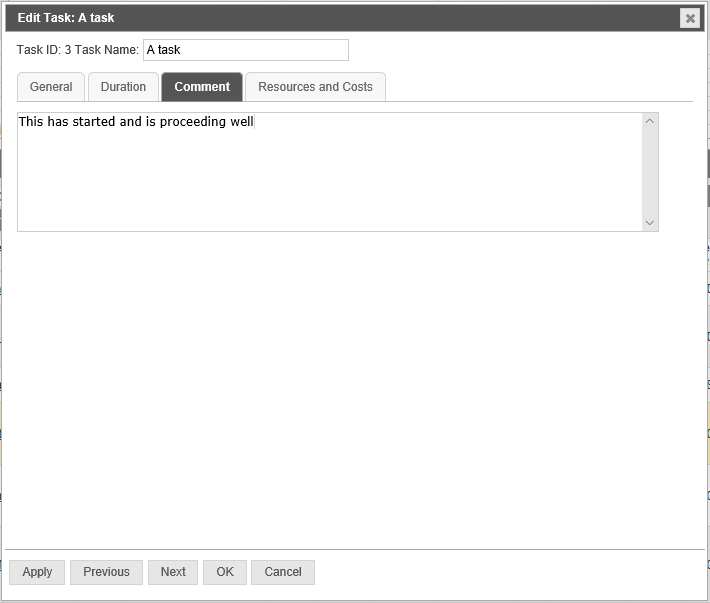
The comment tab allows you to update the comment saved for this task if you wish. This supports copy and paste if required.

The final tab is for Resources and costs assocaited with the task. In the resources section it lists those named resources from the plan who have been allocated to work on this task and shows their % allocation for the duration of the task. To edit an existing entry click on the name in the list and update then apply. You can also remove the selected resource in this way too. To add a new resource to the task pick the name you require from the pick list of existing project resources. If the name you need isn't there you will need to close the task and go to the manage resources button in the Planner Live menu to add a new user to this project's resource list. Here you can also record the actual number of hours the user has spent on the task if you are collecting that data.
The costs part of the form allows you to also specify a Fixed cost (budget) for the task and and Actual fixed cost that has been incurred. This data along with the cumulative figures from the resources area above is used to generate the financial anaylsis for the task at the bottom of the form.
To save changes use OK or to cancel and return to the task list use Cancel.
Each task can be worked on in turn as required in this way until you have finished updating the plan.