Checking back in from email
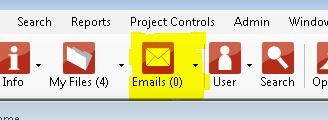
When you have checked out files directly to email and distributed these for recipients to review, revise etc it is important to be able to easily get the files back in to PROJECT in a box to maintain and extend your audit trail. The system provides you with three routes to return files depending on your installation and preferences as follows: Drag and drop to Main menu Make sure your PIAB Windows App is open on your desktop and logged in. Go to Outlook and drag the returned email (with attachments text and all) over onto PIAB application and then release the drag (drop it) on to the quick clicks toolbar (best to aim for the My Emails button but in practice anywhere on the bar will be fine). The Number count shown on the Emails button will increase by one to indicate a successful drop of the file.
When you are ready you can click the Emails Quick clicks to open your Bulk checkin from email form to then select the file, rview it etc before checking inback in using the pop out Checkin form. This approach still requires all the check in rules to be followed (the file must be checked out to you and the file name must be an exact match). This approach should work for any Email software which supports drag and drop functionality. Outlook Tool bar To use this route you must have installed the PROJECT in a box Outlook tool bar during your software install and is only available to Outlook 2003 or 2007 users. To activate the Outlook tool bar open Outlook and go to View > Tool bars and make sure the PROJECT in a box tool bar is ticked. When you receive an email with an attachment to be checked back in make sure the email is selected in your inbox and then click on the tool bar. Our Outlook PROJECT in a box check in form will then open, make sure the mail folder location shown is the same as your system held mail folder and then press the OK button. Outlook will prompt you for access which you will need to confirm then it will strip the attachment and associated information from the email and package these into the mail folder. You can do this each time an email arrives with an attachment. When you are next in PROJECT in a box use the Bulk Check-in from Email form to insert these back into your projects. This can be accessed either from the main menu File > Check-in from email, or using the pull down menu on the side of the Outlook Quick clicks. Using this form you can view and edit any comments left by the person who returned the file and can check them back in by selecting the tick boxes and pressing the Check-in button at the bottom of the form. As with a normal file check-in you can select the appropriate increment version level and set baseline or approved flags (if your permissions are set high enough. You could also decide to undo a file instead of checking it in. You can use this approach to bulk together files for check in and then process them in quantity without having to find each file in the project document tree. You can go through each file in turn revising comments, setting version increments etc and ticking them for check-in and then press the check-in button and it will process the settings you made. Please note, these settings comments etc are only stored while the form is open, if you close it these will be lost. Note: This form only shows you files returned for Check-in on your current project by default. To view files from all projects you are working on tick the All Projects box. Traditional browse All users (with Outlook or any other email client) can also remove attachments from returning emails, tasks or completed appointments using the save as function (first select the attachment). We would advise you save this to your check out/in folder but this can be anywhere with browse access from your PROJECT in a box client. You can then open press the appropriate File explorer check-in button or the Manage Checked out files (tab on My details)and use the browse facility to find the file, unless you saved it to the check in folder in which case it should be shown as present and you can proceed with check in as normal. Note: this allows non Outlook users to continue to send and return files via their email application of choice. |