Explorer
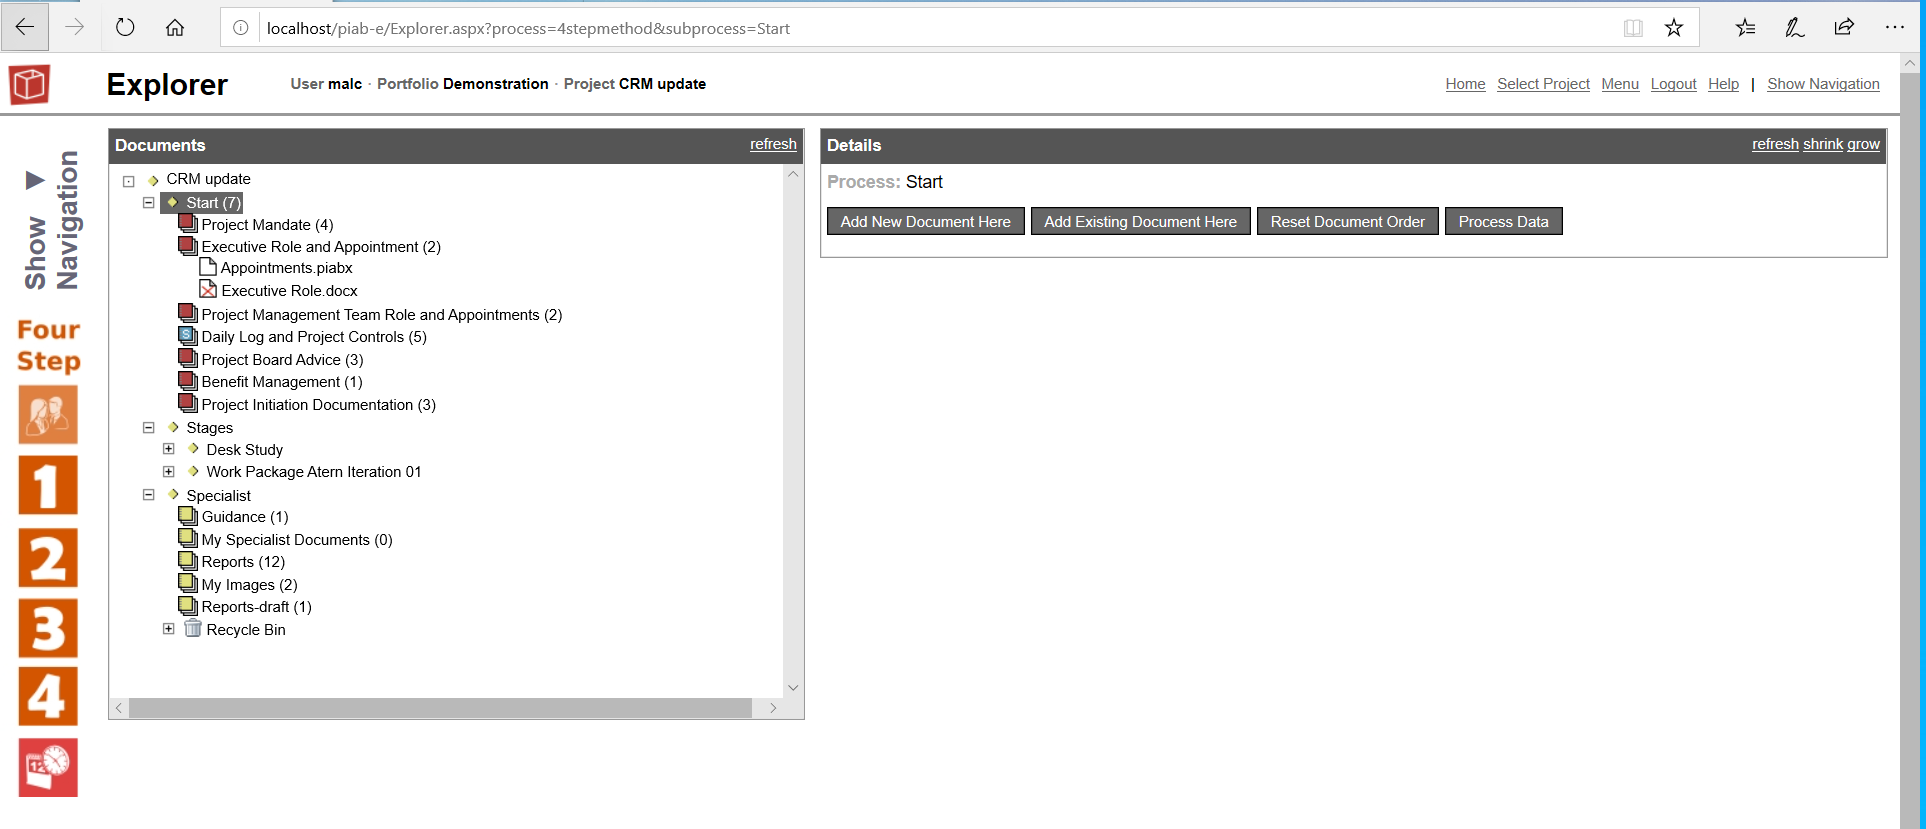
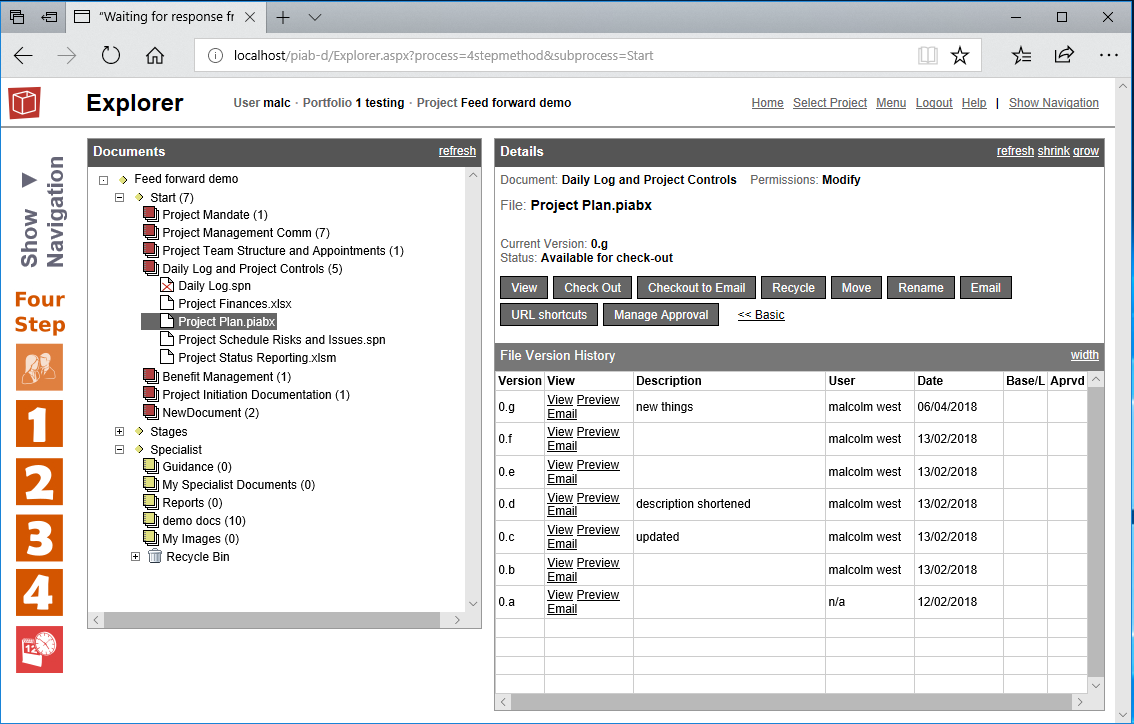
The Explorer provides access to the documentation for the project. All users of the Browser App get the same interface but may see different capabilities depending on their licence and permissions on the documents and files available. Explorer is context sensitive to the selected project process, document and file. Document and file infomation are available in basic (default) and advanced modes. Explorer always only shows you the content for your current project process and this may be selected from either the main navigation diagram or the side bar (if set up to do that) see diagram navigation. The Explorer form always consists of a Document Tree which displays the currently selected process and to its right a Details pane which fills with information about the item currently selected in the documents tree. This could be the process, a document or a file from within a document. The details pane can be increased or decreased is size using the shrink/grow links top right. Below shows Explorer with an expanded documents tree and the default process details. To change the selected item in the Details pane simply click in the documents tree, sections may be opened and closed using the + and - icons, the tree pane will lengthen/shortern to accomodate your process content. If you want to edit the Process properties for the currently selected process use the process data button (which will show while you have the process element of the tree in focus.
In process mode the details pane here above includes options to add new document or exisiting document from another process or to reset the order (further info). These options may not be present for lower permissioned users. If the Specialist part of the tree is selected then the details pane will also include add new folder options.
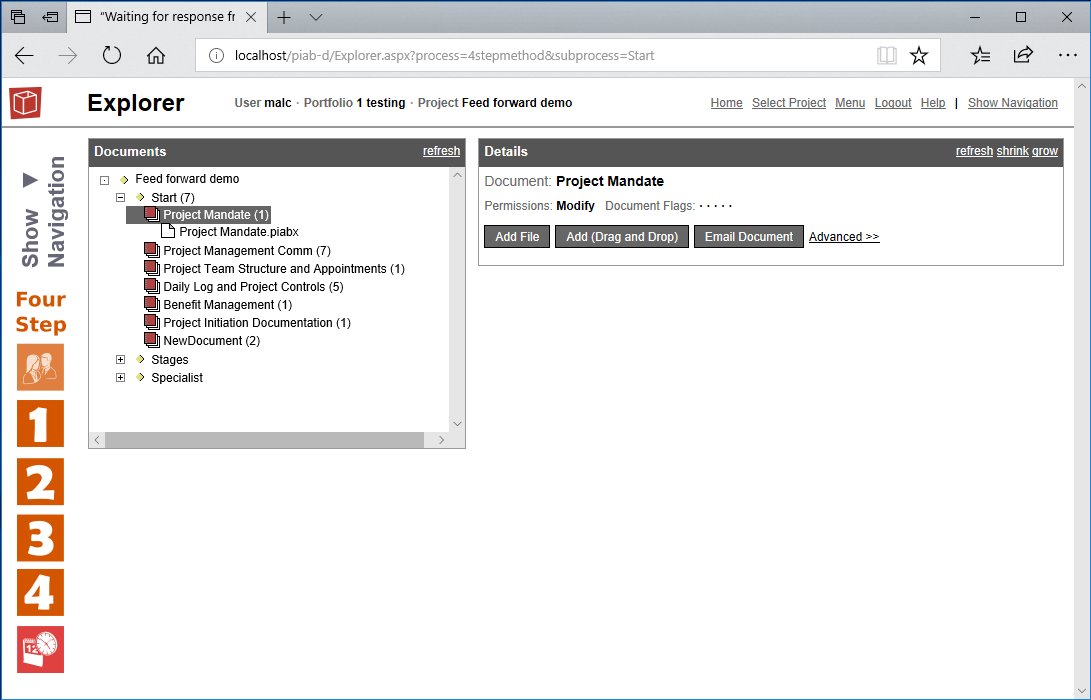
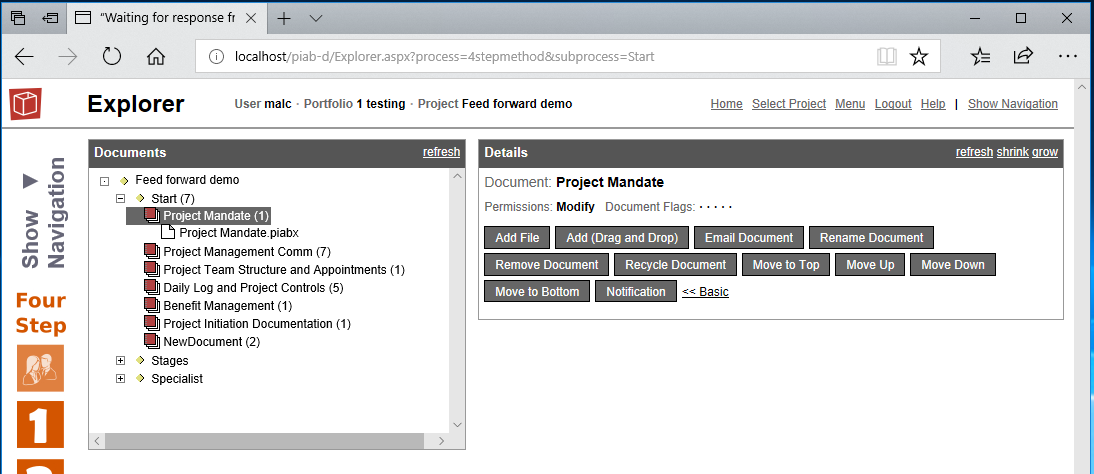
When a document is selected in the documents tree then the details pane displays information relating to that document including permissions and a display of any flags set. This pane can run in either the default Basic or Advanced mode whcih can be changed using the Advanced>>> or <<<Basic links. Shown above is the Basic mode showing buttons to add files (further info) or to send the document out by email. This is designed to support most general day to day users. People with a deeper interest in the document like the owner or PM may need to use features in the Advanced mode as shown here below.
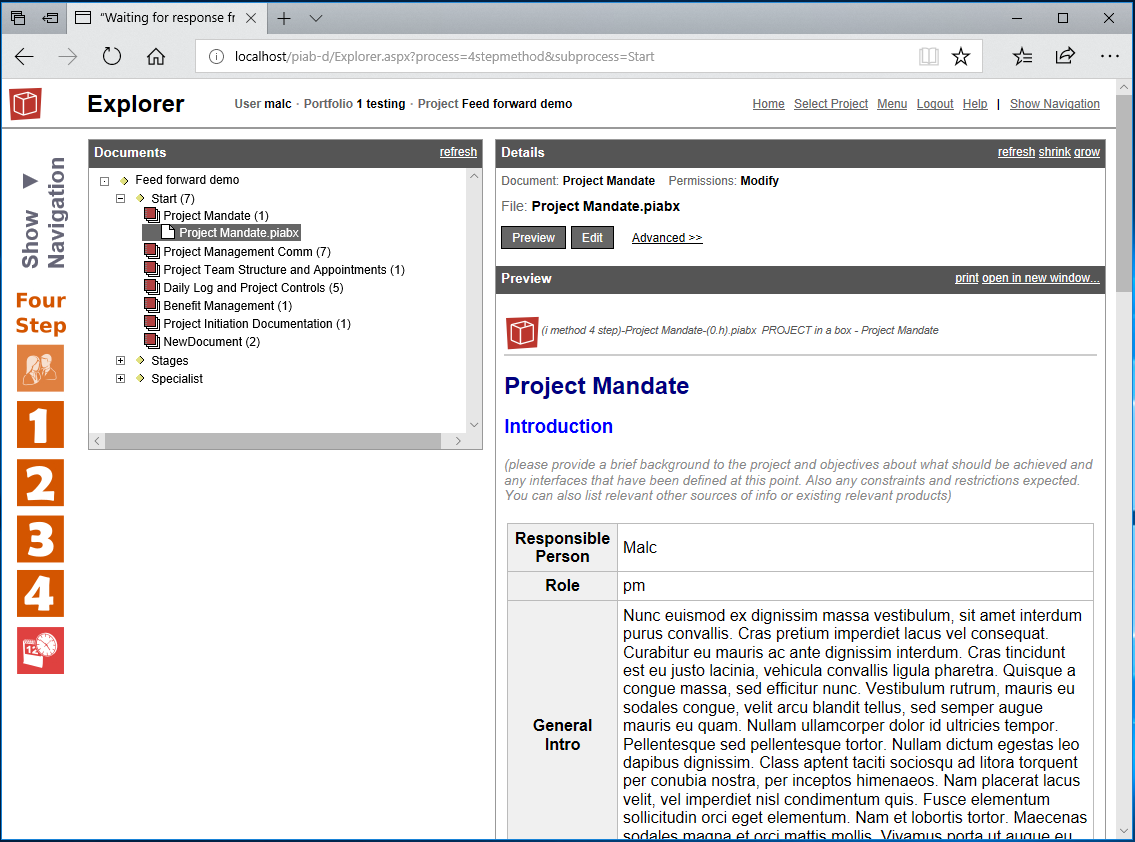
When in Advanced mode further options are available for ordering and removing/recycling (further info) and for managing notifications for the document. The form can be returned to Basic mode with the <<<Basic link. When a file is selected in the document tree the details pane switches to File mode and this will usually start also in a Basic mode as shown below.
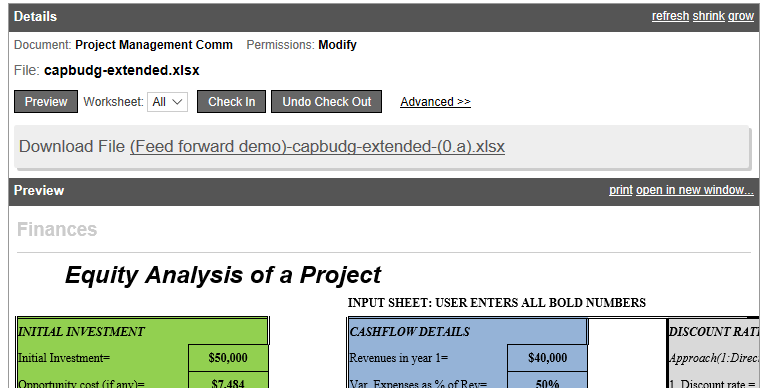
In Basic mode the upper part of the details form provides the context of permissions inherited from the parent document and shows the filename and then the functional otions available for the type of file it is. These vary as follows: For .piabx files: Preview (shows a preview in the lower pane) or Edit (allows edit in the lower pane) For .spn files: Preview (shows a preview in the lower pane) or Edit in Planner (allows edit in Planner live by moving away from this page) For .docx, .xlsx, .pdf, .url and common image file types: Preview (shows a preview in the lower pane) or Checkout (allows you to download the file to work on it in the Application of your choice) For all other file types: View (allows you to download the file to view in the Application of your choice) or Checkout (allows you to download the file to work on it in the Application of your choice) View or preview of files is the most common action where users wish to view the current version to obtain information. When previewing the expand/shrink controls rop right are particularly helpful in maximising the available space, a helpful HTML print is also available. Sections further below discuss editing the files. In Advanced mode all file types get the same options whcih assume a download of the file to view or work on (check out). No preview is shown and that space instead shows the file version history. Other administative functions for the file are then provided as well included setting up approvals process.
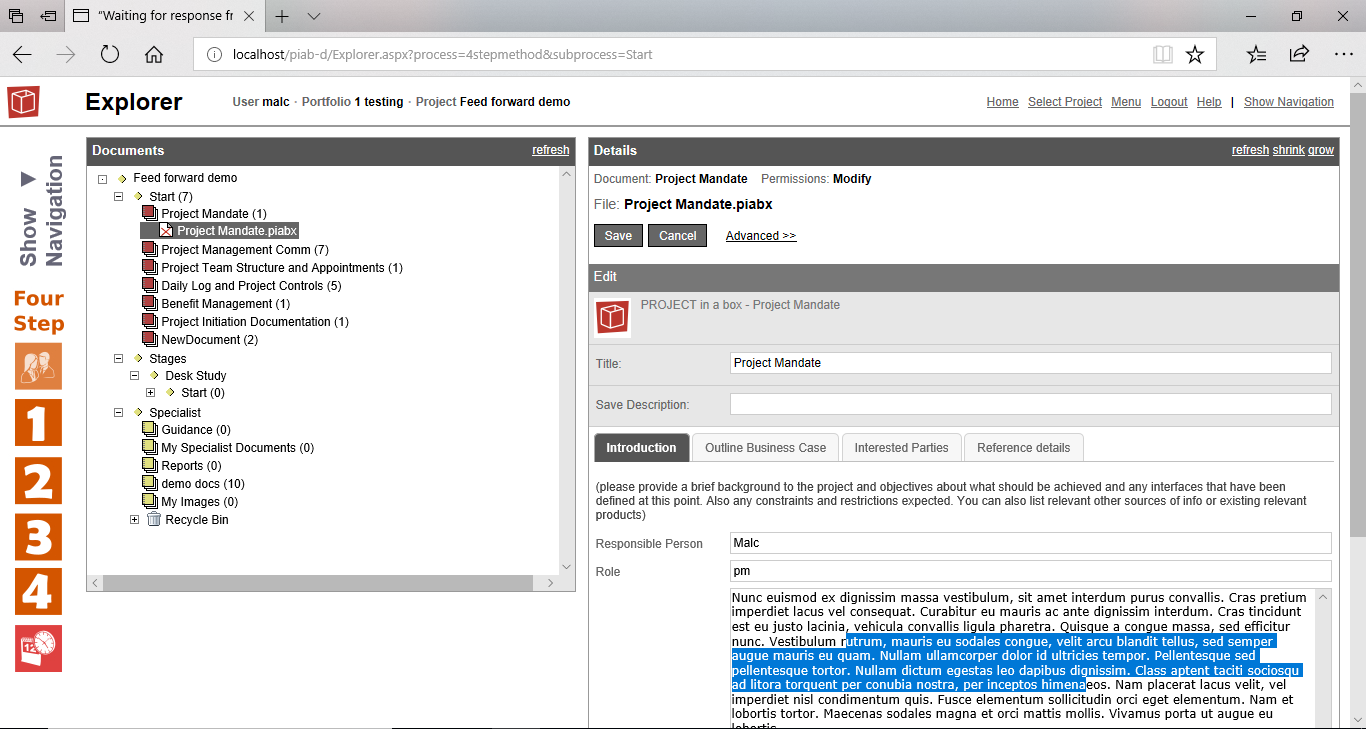
If users want to make changes to the files and they are in Basic mode then there will be a number of alternatives open to them as discussed above Edit (for .piabx files), Edit in Planner (for .spn files) and Checking out and then back in for all other file types and for all files when in Advanced mode. Looking at each of these in turn. Editing piabx files piabx files can be edited live in the browser if the user has sufficient permissions and the file is not already being edited/checked out by a different user. The edit button will change the piabx file in the preview pane to an edit form with each section showing as a tab. Properties will be updated into the file from the server if that is required.
You can copy and paste or edit the content as you wish using this form. Picklists and date pickers may also be present in some fields. Data loaded as property is view only and cannot be edited. You can leave the page and return when you wish to continue with your changes. The file will remain considered as checked out to you until you are ready to return it. Use the Save button in the form to complete the check-in. You may optionally complete the save description field which will be used in the file version audit trail. See here for much more information on working with .piabxfiles in the browser. Editing in planner live spn files are offered for edit in Planner (Live) this option allows you to edit the planner file content directly in the browser. It opens it in the Planner live part of the application which also covers it's check in. see here for further information on this. Checking out and in All files held in the system can be checked out to edit in an application which supports the opening and editing of that file type, assuming the user has sufficient permissions and the file is not already checked out to another user. Clicking the Checkout button presents a Download file link for download of the file. We recommend you right click and use the 'save target as' option to store the file in a location you can find again before you start to edit. Note that in some browsers a direct click of the link will save the file to a consistent known location, for example 'Downloads'saving you the need to do the right click step.
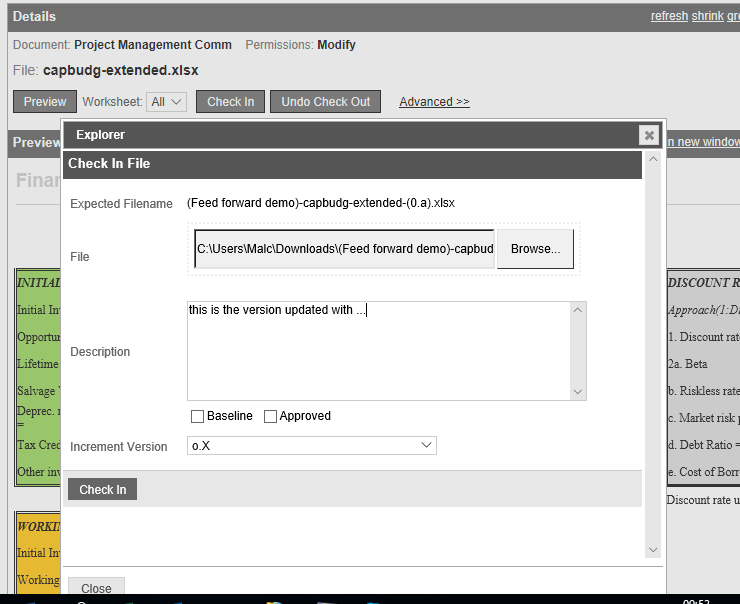
As soon as you have pressed check out the file is considred as checked out to you and as well as giving you the link the interface has changed to offer you the options of Check in or Undo checkout. If you decide you don't want to check back in an updated version at any point you can press undo checkout. Once you have finished making your desired changes to the file and you want to check it back in click the Check In button and the form will pop out over the main browser background. Use the browse facility here to browse to your file to check in. Note it must have the same file name as the system is expecting. You can add a description of the changes if if relevant alter the version numbering choice or flag as self approved. Confirm with the Check In button and the file will be returned to the system as a new version and aduit trail information updated.
|